
Table of Contents
Introduction
There is so much joy in getting the ball to start just right the target and curve back. A draw looks great, increase distance, and most pros maximize it. A nice draw can add more than 5-15 yards with more roll out once on the ground depending on the fairways’ speed. Giving you more options throughout the round and saving your strokes all around the course.
Many golfers find draw an unattainable goal, a mountain too big to climb. They conclude after several research, practice, only to crush the ball off the tee, starting it 15 yards out to the right, and wait for it to swing back into the middle of the fairway. But the moment never comes, or the ball swings even further to the right through the air, leaving you with a lost ball and a terrible start to your round. Creating this beautiful shoot depend on understanding how it is made and not lack of ability.
This article will help you fix common mistakes in creating that perfect and reliable draw every time.
What is a draw shot?
Draw shot or draw is the term used in describing the flight path of the golf ball. The trajectory curves towards the right and bend towards the left just before it hit the ground. The draw shot speed is average, where the shot’s height isn’t too much, but the distance is quite considerable. Upon hitting the ground, the ball rolls on the fairway, covering some distance.
Golfers can play draw intentionally; to avoid playing over a bunker, you can play a draw by a bunker on the left side by aiming a little out to the right and draw the ball back to the left. You can consider a draw with the opposite of a fade or a less- severe version of a hook.
7 steps to achieving the perfect grip
Below are seven proven steps to guide you on how to hit a reliable draw and improve your options throughout the round. Kindly bear in mind that the article will assume you are a right handler. All a left-hander will have to do is the reverse of steps to suit their need.

STEP 1- Align yourself to the right
Since a draw is made in the direction of right to the left, this indicates that you have to align yourself towards the right. The ball will make a curve from right to left on its own. The angle to which you align yourself depends on the curvature angle of the trajectory you want to take from the draw. The distance to the right you want the ball to move depends on how far the ball will move in the air, i.e., the further to the right you go, the larger the draw is likely to be.
STEP 2- Align the club to face the ball
Retaining your alignment in step one, re-align your clubface to face your actual target. While aligning your clubface, decide a target point on the field, a spot on the green where you want the ball to land. Without moving your body, move the club face closer to the ball. Your ball should be right in the middle of the clubface to achieve that perfect draw trajectory. 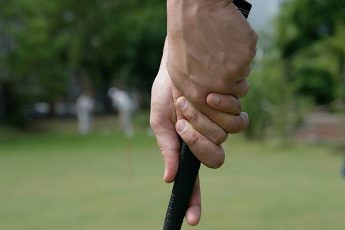
STEP 3- Change your grip
Correct your grip before taking the swing is important because the driver’s grip will have undoubtedly falter. Rotate your hand underneath the club, allowing your wrist to roll over easily at impact. See it as the same as how a baseball swing in motion where your hands are turning over at impact. You can then increase the pressure on your right hand without weakening the left hand. Doing this will help roll the club over at impact.
STEP 4- Swing along your body line
You must swing the club in the air in the alignment of your body. The swing direction will be inclined towards the right as your body is already aligned to the right. The swing direction of your leg should be the right of the targeted spot on the field. Press the foot of the other leg in an inward direction to make a forward swing.
STEP 5- Stance proper
Perfecting your stance will not happen at once. You will learn from the repeated process. However, without finishing your stance correctly, you won’t get a perfect draw shot. Keep the right shoulder facing the target in the right direction until you hit the ball. Draw out your chest so that you can keep one foot in the inward direction with the other ready for a forward right swing. Your bodyweight should be on the right leg and remember not to shed the weight to your hands while holding the club to the ground. It is best to rotate your shoulder a bit to the driveway.

STEP 6- Swing smooth
You have to keep in mind that the rotation of your body during swinging affects the draw. Many golfers get so excited by the prospect of hitting a big, long draw, that while trying to smash the ball as hard as they can, they over-rotate their body. Swinging too hard will not translate to a great extra distance. More of what should be on your mind when hitting your draw should be hitting the ball out to the right. A draw will generate the extra distance, not the force but by itself.
STEP 7- Visualize the trajectory
As crucial as this strategy can be, it is mostly being overlooked by most golfers. Most amateur golfers will not even imagine their ball flight and trajectory before a swing. This is wrong! Once you have perfected the distance from the previous tips, all you need to do now is to imagine and picture the ball flight to the desired point you want it to be. Instead of focusing on the hazards, the rough and the bunkers, picture the ball flight and trajectory. This is very important.

Conclusion
Hitting a draw is easy, once you factor in all important steps. A great draw will help boost your confidence. Try to swing hard will change nothing without following the right steps. To perfect your draw, you will always have to rely on your alignment since you wouldn’t want to make an embarrassing shot. After carefully studying this article, try them out when next you are on the golf course, and you are sure to experience improved gameplay. Enjoy!